Skip navigation

Tag Archives: studio equipment

    focus-330-vs-man

This morning I got a chance to sit down with H.W. Briese, the founder of Briese Lichttechnik and Gerd Bayer who oversees their New York operation, Briese-NY.  As part of his stateside trip, Mr. Briese is here showcasing their full line of continuous light and flash products today-10/21, until 10pm and tomorrow-10/22, from 10am-6pm, at Jack Studios (601 West 26 street, NY, NY 10001- between 11th and 12th Aves.)  The studio is perfect for showcasing the line of focusable parabolics,  strip boxes , ballasts and packs that Briese is known for.  I must admit I was overwhelmed as I walked between the two rooms; it is rare that light modifiers themselves are as captivating to look at as their output. 

Among the new products Mr Briese is showcasing here in New York are the Focus 96 and 150 parabolics and the remote controlled, Focus Help which allows for changing and/or fine tuning the lamp position, without having to lower the Focus manually for adjustment and then reposition it.

Mr Briese describes the Briese lights as “efficient.”  He maintains that the special quality of the light is the result of its components; from the u shaped flash tube to the movable lamp to the shape of the modifiers themselves.  He also reinforced my belief that the key to understanding and unleashing the power of the Briese light is learning how to adjust the position of the light within the Focus as well as adjusting the power of the pack. For some photographers this may represent a paradigm shift, as many of us look at adjusting power as the sole means to control the light once in the modifier:  With the Briese system, the movement of the flash head within the modifier is fundamental and as important as adjusting the power.

Mr Briese also made me realize how versatile the Focus range can be:  you have a light source that can go from a spot to a flood and cover a lot of ground in-between.  Usually when people are talking about parabolics and particularly the larger ones, they talk of the brilliance and wrap of the light.  In moving the lamp within the Focus (the amount of movement you have varies according to the size of the Focus product you are using) you can indeed change the light characteristic and falloff.


Unlike many companies that specialize in either flash products or continuous lighting products, Briese does both.  According to Mr Briese, they have been manufacturing HMI products since 1985, and added tungsten to their product line a few years ago. With the bases covered from “3250k to 5500k to flash,” Briese feels that his company is well positioned to navigate and serve the converging stills and motion markets.

If you are in New York   and want to get a first hand look at Briese products, the event at Jack Studios is open to the public.

_MG_0483

_MG_0490

_MG_0477

_MG_0487

As more and more H(d)SLR cameras hit the market, there will be a greater interest in and demand for continuous lighting solutions that can be used for both still and motion capture.  I decided that I wanted to look at some options available at different price points for AC and/or DC use.  I also decided to look only at off camera solutions.  I removed incandescent lights from consideration as I wanted high output, low wattages and minimal heat.  I established three thresholds for solutions:  Up to $100; up to $500; and up to $1500.  Rather than covering several lighting options in one post, I will write about the solutions separately between now and the middle of November. 

 I decided to explore an under $100 lighting solution first.  I was a bit skeptical as a people shooter that I would find anything I felt comfortable with in this price range.  After doing a fair amount of searching, I settled on a couple of $42USD, Adorama, Flashpoint brand umbrella-style soft boxes and cool fluorescent bulbs.  In fact, I added $30 to the budget and bought three “Kits.”

flash-pt1
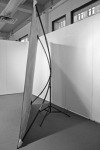
Basically a “Kit” consists of a 20 x27’ soft box built around a light bulb:  Take the bulb out, remove the cord, collapse the unit and you are ready to go.  Now let me “be perfectly frank;” for $42 you shouldn’t expect and don’t get premium brand construction or finish:  The plastic base plate assembly is not the most elegant solution in terms of opening for mounting to a stand and/or tightening it when mounted, and I found myself struggling a bit to get the baffle evenly attached to the box as well.  What you do get for $42 however, once you get the light attached to the stand and the baffle on snugly, is a light that works overtime and the comfort of knowing that if you damage the bulb or break the box, replacing either won’t set you back a king’s ransom.  And most importantly, you get a light which can be used for video or still work and does not generate the kind of heat that can make a set uncomfortable.  If there are drawbacks, the biggest is that the light is not dimmable.  One solution might be to buy a few bulbs of different wattages for flexibility or place additional diffusion material on the front.  Another drawback is that even with the baffle, there is a “hot spot” in the center of the box resulting from the bulb: You may see it in the catch-lights.  The biggest downside is that the 85 watt “spiral” bulb is huge!  If you buy these lights, feel free to discard the box the entire assembly ships in as the soft box, cord, baffle and adjustment lever come in a nice black canvas case, but you will want to keep the box and form the bulb comes in.  Drawbacks not withstanding, yes indeed, I love these lights!flash-pt-5

flash-pt-7 

According to Adorama, the 85 watt bulb included in the kit I purchased roughly puts out the equivalent of a 480 watt tungsten bulb.  My conclusion—it is indeed close to that.  Adorama also says the temperature of the bulb is 5500K.  That may indeed be the temperature of the bulb, but my unscientific eyeball test felt that the light in the silver box with baffle mounted was cooler than 5500k, so you may want to custom white balance for the best result.

The kit currently on the Adorama site comes with a 70 watt bulb and sells for $39.95. The only difference between the “Kits” I purchased for $42 and the one currently listed is the bulb.  The 70 watt bulb according to Adorama, puts out the equivalent of a 350 watt incandescent light.

I feel this is a wonderful product worthy of consideration for those seeking to light for motion and still work at a most compelling price.

© 2009 bkatkinson     © 2009 bk atkinson

^ Stills  captured during a video shoot using a single Flashpoint “umbrella-style” Soft Box Kit.

 I want to make a few general comments in closing: First, for those of you who own flash lighting equipment already, if you try using those modifiers with continuous lights, make sure they are properly ventilated and heat rated as a lot of light modifiers which are routinely used for flash applications are not made to be used with continuous lighting and particularly those that generate a lot of heat.  Going forward, if you are going to be shooting with flash and continuous lights and want to use the same modifiers, you may want to make sure that you buy modifiers that are appropriately rated.  The second point I want to make is that even though some lighting is considered “cool” the term cool may be relative:  Be careful handling fixtures and bulbs, especially immediately after turning them off.  If you are shooting with fixtures that require installation and removal of bulbs, store and transport them with care. 

Glossary:

H(d)SLR stands for “hybrid digital” or “high definition” single lens reflex cameras -you decide which.  This is what I call cameras such as the Canon 5dMarkII and 7D, the Nikon D90, and the D300s, and other DSLRs that are video capable.

single-standing-rev
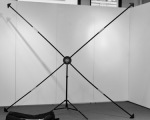
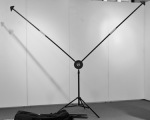
While I have several light stands of different heights, the stands I most commonly use when traveling and on location are eight-foot stands.  The promise of less bulk has tremendous appeal to me and most location photographers, so with that in mind I ordered a pair of Manfrotto 306B Stacker Stands from the Calumet Photographic store in New York.  When I picked the stands up, I  responded positively to the narrow rectangular boxes which affirm  how streamline these stands are.  In fact, my response was so positive that the fact that the three-section Stacker Stands were taller closed than my “generic” brand four-section, eight-foot stands went unnoticed.  In my defense, I had been using a 13-foot stand for testing for several weeks, so that impacted my frame of reference.

The 306Bs are well made; I did not, however, find them substantially better or worse in build to my other stands.    What struck me when I set the stands up was that they were occupying more floor space than I recall my “generic” brand 8 foot stands requiring.  The footprint diameter of the 306Bs is 42.5 inches versus 36 inches for my generic brand eight-foot stands.   Closed, my generic stands were a relatively “compact” 26 inches versus 34.3 inches for the closed 306Bs.  So the Stacker Stands require more floor space, and in terms of packing, a longer bag than my generic eight-foot stands.  This is not surprising given that the 306Bs have 3 sections  versus my “generic” stands which have 4 sections.  Additionally, each 306B weighs nearly a half pound more than each of my generic eight-foot stands.  Now, one might expect me to conclude that there is no real advantage to the Manfrotto 306B stands in terms of closed lenght, weight and footprint when compared to my generic eight-foot stands.  It is not quite that cut and dry.  

For the traveling photographer concerned with bulk and containment and/or the location shooter, the Manfrotto 306Bs offer tremendous advantages.  They can be clipped together and the irregularity in shape and cumbersomeness of transporting conventionally configured light stands is substantially reduced or eliminated.  A shoulder strap can be attached to the collapsed stands offering a great hands free carrying option.  If storage space in the studio, home or even in the car trunk is a premium, you will definitely see an advantage with or benefit from having multiple Manfrotto Stacker Stands.  According to Bogen Imaging, which distributes Manfrotto products here in the USA, seven Stacker Stands requires the same space as four traditional light stands. 

 If you are buying a single stand, you may not see or appreciate the utility of the Stacker system; but if you need or intend to buy multiple stands, the 306Bs or the other Manfrotto Stacker Stands may be worthy of consideration.  The 306Bs can be purchased individually or in three stand “kits.”  All in all, I found the 306Bs an elegant and efficient solution to a concern or problem that many photographers face. Thumbs up to Manfrotto! 

standiingrevised-base=uprevised-base-comp

 .

hensel-kit-1If I were in the market for a 1200 w/s battery pack today, there is no doubt in my mind that the Hensel Porty Lithium 12 would be a top contender.  I reached this conclusion after having the opportunity to spend some time with the Porty Lithium 12 thanks to the folks at Hensel USA, and Fotocare in New York.  For the location photographer, there is much to like about the Porty Lithium 12:  It is one of the lightest 1200 w/s battery powered units weighing in at 13 lbs and that is with the battery on-board.  The unit has outlets for two heads which can be powered 1:1, 1:2 or 1:3.  There are seven f-stop power levels (a six f-stop range) which is adjustable in 1/10 increments or in full stops.  The Porty Lithium 12 is also among the fastest 1200 w/s battery generators with recycle at full power in 1.95 seconds, placing it a mere .15 seconds behind the heavier, more expensive Profoto B2.  With the Porty Lithium 12, Hensel has bested the performance or its own popular Porty Premium with respect to three aspects which are important to photographers:  Weight, size, and performance. 

 If you are considering the Porty Lithium 12, the one light kit seems to be the most attractive and “cost-effective” option.  In addition to the generator (which has a built-in Hensel Strobe Wizard radio receiver) and battery, the kit includes:  One Hensel EH-Pro Mini 1200P flash head; a fully detachable head cable; a 7” reflector; one light stand; the Porty Lithium Quick Charger; and a soft wheeled case.  The flash head has a 65 watt modeling lamp which puts out the equivalent of 120 watt incandescent bulb.  As with most battery generators, the lower powered modeling lamp will be useful under some circumstances and sub-optimal in others.  The kit comes with a Hensel Strobe Wizard Plus Transmitter which can be mounted on the camera to facilitate flash triggering, as well as being used to adjust flash output and modeling lamp intensity.  While the current MAP of the Porty Lithium 12 Kit is $4450USD, you should check with Hensel dealers for street pricing and availability, as availability may vary by dealer.  A complete list of dealers is available on the Hensel USA site.

 hensel-porty-l-12The Porty Lithium 12 is well made.  The fit, finish and extent of “environmental” sealing/protection is excellent.   The controls are as intuitive as it gets.  The squat profile of the unit and wood handle suggest it is substantial in weight, but when you pick it up don’t be surprised if you marvel, as I did, at how light the unit actually is.  I was also keenly aware at the lightness of the Pro Mini 1200P head.  Hensel officially list the weight of the head at 5.7 pounds, but that includes the 16 foot cord. The head alone weighs in the vicinity of three pounds.  Hensel wisely designed the unit with a detachable cord, which is of great assistance for packing and storage, and is a feature I would like to see more manufacturers adopt.  The head comes with a clear dome and a protector cap.  The light is clean and in my opinion on par with that of other premium brand products.  In my testing, the units recycled as fast as Hensel claims at full power.

 One of the most intriguing aspects of the Hensel Lithium 12 is the battery.  Hensel is the first lighting manufacturer, to my knowledge, to offer a lithium battery in a portable generator.  In order to understand the significance of the lithium battery, one only has to compare the battery of the Porty Lithium 12 and the older Porty Premium Plus:  At full power, Hensel estimates about 230 pops for the lithium battery vs. 250  pops for the Porty Premium Plus battery.  Let’s not split hairs over 20 pops and call them roughly equivalent.  hensel-battery1The Lithium 12 battery/cassette weights 2.5 pounds; the Porty Premium battery and drawer weighs nearly 9 pounds.  For the traveling photographer who is concerned about weight of gear, the weight differential, particularly if one needs to carry multiple batteries, is significant.  If the weight of the Lithium 12’s battery is the upside, the downside of the lithium technology is that the batteries are expensive:  A second lithium battery/cassette runs over $500 USD.  To be fair, the price of an extra Hensel lithium battery/cassette (2.5 lbs) is in the same range as a second battery and drawer (11.4lbs) for a Profoto B2.

The Hensel Porty Lithium 12 may become an even more versatile tool for photographers if the long-rumored AC adapter becomes available this Fall.  For some an AC/DC Porty Lithium 12 may become an all around lighting solution for their shooting needs.

 I should mention that Hensel also makes the Porty Lithium 6, which is a 600w/s unit.  Given the fact that there is only a $330 USD difference between the price of the Lithium 6 and Lithium 12 generators, I personally would be hard-pressed to consider the less powerful unit as the Lithium 12 offers more “pop” for the buck!  Hensel also offers a robust line of light shaping tools, many of which are attractively priced.

 In order to give photographers an opportunity to experience all that the Porty Lithium 12 offers, Hensel USA has been making several two light kits available for rental through their dealers across the country.  The Porty Lithium 12 Kit has been in New York at Fotocare, and in Los Angeles at Samy’s.  You can check the Hensel USA Website for the current location of the kits for rental or contact Sharon or Mark Gottula through the Website for additional information.


Note:  The images displayed are of the two head rental kit and may show and/or include items that are not a part of the one head kit available for purchase.

One of the more popular trends in photography today is the use of parabolic reflectors.  Now we are not talking about small metal reflectors but rather large and in several cases significantly larger umbrella shaped reflectors; at one end of the spectrum are the 5 to 10 foot tools like the Broncolor Paras, and the Profoto Giants, and at the other end the Mola Setti  and the  Elinchrom Deep Octa,  are examples that come to mind.  The quality of light that these shapers produce is truly wonderful, and is owed in part to a combination of their size, shape, depth, surface finish, and in some cases the ability to focus the light source.  With the exception of the Elinchrom, few of these light shapers are extremely portable, and none lend themselves for use with speedlights.


I have had a long standing love affair with these larger parabolics, as I like the directional properties of light they produce.  They play a prominent role in my photographic lighting.  I found myself looking for a smaller version that I could easily carry and have the option of using with speedlights.  Hensel must have seen me coming, because their 32 inch (80cm) Master White Parabolic Umbrella is just what I was looking for.

tripanel-web


Now I am not a big user of ‘traditional’ photographic umbrellas.  I have four of them:  Three came in lighting kits, and the fourth, a 60” silver model I purchased after using a 5 foot Profoto Giant, hoping I might get similar results for a fraction of the cost.  Not even close!  The distinctive deep profile of the Hensel was too hard to resist.  Vinnie at Foto Care, placed an order with Hensel USA and within a few days the umbrella which I have dubbed “Paralite” arrived.


The umbrella which is extremely well made comes in its own carry bag.  The setup and take down couldn’t be easier; if you have ever used an umbrella, photographic or rain, you know exactly what to do.  Get a light stand, the flash of your choice and you are ready to go.  The light from this umbrella is smooth as opposed to brilliant, which is no surprise as the interior is white.  Because of its shape, the angle of spread is narrower than a conventional umbrella of the same size.  The results are a directional but diffused light, with more defined shadow and contrast.  While you may be able adjust the position of some lights along the umbrella shaft, I would not characterize the Hensel as “focusable” in the same way that the Broncolor, Profoto, and Mola products are, as the shaft is relatively short.


For the portrait, wedding and/or location shooter looking to travel light, this umbrella is just different enough to be compelling.  It’s portable, easy to set up, and offers diffuse yet very efficient light.  If you are using a speedlight, consider using the widest setting for the best light distribution.  Hensel USA tells me that contrary to conflicting information on some retail sites,  the umbrella comes with a two year warranty. 

In my opinion,  the “Paralite” is a real winner.

Last fall, I got a taste of “rare air” at Photo Plus Expo in New York, courtesy of Profoto and their magnificent Pro-8 Air system.  I refer to it as “rare air” because its performance and price point put it in the stratosphere for many photographers and small studio owners.  While the blazing speed was impressive, the most interesting aspect of the Pro-8 Air system to me was the switch from the analogue controls of the Pro-7 series to digital and the wireless control capabilities that evolved as a result.  I left the show wondering if and when we might see “Air” in other Profoto products.


Last month, with the announcement of the D1 monolights, Profoto has made “Air” available to a broader audience. profoto d1 500 air It is also an indicator that the Pro Air system is becoming a standard wireless protocol for Profoto products.  As a user of Profoto battery packs and ComPacts, I was particularly interested in the D1 system as the specs seemed to address my issues with the current generation of monolights.


If you have ever worked with monolights on a boom or placed high up, you know that making manual adjustments to output can be difficult and time consuming.  The Profoto D1 Air system addresses this problem with the Air Remote which literally puts control of the lights in your hand or in the camera hot shoe.  No more raising and lowering light stands to fine tune the power or to adjust the modeling lamp.  While Profoto is not the first major lighting manufacturer to move in this direction, it is a welcome move nevertheless!

 profoto air remote

My other issues with the current ComPact units are size and weight:  My ComPact 600 from the end of the unit to the tip of the glass cover measures a whopping 16 inches long.  The D1 is nearly 5 inches shorter, is lighter, and includes an integrated handle and reflector.  While the power may vary, the housing of the D1 units is the same, so if you are shooting with a 250 or a 1000 w/s unit, the physical dimensions of the units are identical, but weight will vary.  The D1s also offer a greater degree of lighting control than the ComPacts:  7 stops (500-7.8w/s) adjustable in whole stops or in 1/10 increments versus 5 stops (600-37.5 w/s) adjustable in 1/8 increments; shorter recycling times and for the international traveler, they are multi-voltage.


One of the biggest concerns I had with respect to the D1s design was the built-in reflector.  With a 77 degree spread, I worried that light quality/quantity would be compromised especially when using a beauty dish, one of the giant parabolic reflectors, or the magnum reflector.  The folks at Profoto must have anticipated this reaction because there is an optional dome-shaped glass cover available that should give the additional spread that many of us are use to.  Since I did not have access to the dome, I cannot comment on the spead differential.  I suspect that transport and handling concerns may have influenced the decision to go with a built-in reflector.


I found the D1 well-designed, well-built and extremely easy to use.  The controls are straightforward and intuitive.  Now the D1s come in several flavors: the big question if you are considering the 250 or 500 watt/sec units is whether “to Air or not to Air?” The 1000w/s unit only comes with Air.  Personally, I would have to have Air.  Much of a photographer’s work is about control, consistency, and efficiency; all benefits of the Pro Air system.  Users of the Pro-8s may find the D1s attractive as they are fully compatible and controllable with the same Air Remote and optional software.  The optional Air Sync makes it possible to trigger non air equipped packs and monolights.  Profoto also has indicated that an external battery will be available, possibly as early as this summer, as an option for the D1 system making it a potent tool for both studio and location work.


The D1s are not priced for the faint of heart.  If you have a limited lighting budget, at $1179 for a single 500 w/s Air unit, (the Air Remote must be purchased separately) or $2679 for the D1 500 Air Studio Kit (which includes:  two D1 500 Air units; a case; two light stands and umbrellas; and the Air Remote), the D1s may not be a viable option.  If, however, you like or use Profoto generators and the Profoto Light Shaping System, or use criteria other than or in addition to absolute cost to determine value, the D1 Air units may be a very attractive and versatile addition to your lighting arsenal.


While I believe the D1s have tremendous appeal on their own and in conjunction with the Pro-8 system, as well as with more products as the Pro Air “stable” expands, for many users of Profoto products like myself, with built in Pocket Wizards, there are some interesting considerations, none of which are product killers or insurmountable.  Unlike the Pro-8, there is no option for a built in Pocket Wizard with the D1s.  If I were to use a D1 500 Air  in conjunction with Pocket Wizard equipped Profoto products, I would use the Air Remote to adjust power, and plug a Pocket Wizard in to trigger the lights.  Another option, but in my case not a cost effective one, would be to purchase a couple of Air Syncs to trigger the non air equipped lights and generators.  And what about metering?  My Sekonic light meter works perfectly with the Pocket Wizard set up.  If I were opting to shoot only with the D1 Air units, I would  have to set the light meter to “cordless flash mode” and make sure the lights are triggered with the Air Remote within the 90 second timeframe.  These are not the most seamless solutions, but they are workable.   Profoto does not appear  to be resting on their laurels, so the options and considerations may change.


For more information on the Profoto D1s and other Profoto products, click.here.


Update:  After purchasing the D1 Airs in April, I discovered that it is possible to  mount the Air Remote to a PocketWizard Flextt5, and fire the D1Airs and my PocketWizard equipped packs  simultaneously!  Additionally, in this configuration, the Sekonic Meter with the PW module will also trigger the D1 Airs.  To read more about this, check out my May 5, 2009 entry.


I often look at equipment with an eye on whether it will allow me to accomplish a task more efficiently:  More efficiently for me usually translates to mean easier to carry and easier to set up, as most of my work is on location.  So it was with great interest, and I’ll admit a healthy dose of skepticism, that I went to the Calumet Photographic Store on West 22nd Street here in New York, to spend some quality time with their Portable On-Site Background System (PBS).  I say skepticism because I have tried collapsible 8′ muslin systems, as well as the more traditional crossbar type background support systems and have yet to find one that has impressed me enough for consistent use. In fact one of my more embarrassing photo shoot  related stories centers around the difficulty I had trying to get a collapsible background back in the bag.


When I arrived at Calumet, I was greeted by Ron Herard.  Ron handed me the bag which housed the Calumet system and we headed upstairs to their second floor gallery space.  While Calumet lists the kit as weighing 12 pounds, it did not feel that heavy.  When we got upstairs Ron asked me if I would time how long it takes him to get the system out of the bag and up for use.  One of his colleagues doubted it could be done in less than five minutes.  Well for the doubting Thomas, it took Ron a grand total of 2 minutes and 40 seconds.  I watched in absolute amazement:  An adjustable stand, a central cylinder in which you insert 4 flexible rods with round ends, 4 flexible extension rods, an 8×8 sheet of muslin which fits on the “arrow” tips of the extension rods, and you are good to go!  It is simple and intuitive.  It took me 3 minutes and 12 seconds to take the PBS out of the bag and erect it.  Not bad for a first timer!  I was able to dismantle the frame as quickly as I erected it.

Also surprising to me was the fact that the system does not require any additional clearance beyond 8 feet to erect.  Unlike the traditional cross bar support systems which require additional space on each side to accommodate the footprint of each stand, the Calumet PBS does not.  This is one elegant and efficient solution.  The muslin sheets have pockets on each corner which fit securely on the rod arrow heads.  The pockets are well reinforced.  Additionally the tautness of the fabric and frame interface, acts to stretch the fabric:  This resulted in a substantial number of wrinkles and creases in the folded sheet that was used either being reduced significantly or eliminated.  If you are getting a sense that I like this system, it is because I do. 


One of the downsides to this system is that you may not want to use this system against a window or with a light source  directly behind it as the stretched muslin is thin enough that the x frame may be seen.  Others may find the lack of availability of a floor apron as a drawback.  But all in all I found the system superior to the other alternatives I have tried and yet competitively priced.

I thanked Ron and Store Manager John Dessereau as I left, but not before placing an order for my very own.

For more information on the Calumet PBS, click on the blue highlighted text in this entry.